Showing posts with label M & M Soaps. Show all posts

Monday, May 19, 2014

Life IS Sweeter With Bees!

 
We have been quite busy lately with many different projects.  But the project I am most excited about is that of recently having established our own apiary yard.  I have always been intrigued by the amazing honey bee, but because we lived in suburbia, I never considered beekeeping a possibility.  That all changed once we moved out here. 
 
Not too long ago our awesome neighbor offered to give my daughter and I a live tutorial on beekeeping.  How often does an opportunity like that present itself?  The morning of our date with Ali and her bees my daughter and I were SO excited.  We both suited up and were able to get up close and personal with the sweetest insect known to man. We were able to see how honey bees function and what their unified mission is - to work themselves to death (literally) in caring for their queen bee.  There was no fear (especially on my daughter's part), only awe and marvel at how gentle these productive and organized little creatures are.  It was fascinating to learn that every action taken by the honey bee is with the sole purpose of ensuring the survival of its colony.  There is no ME or I... only WE and US.  I think humans can learn a lot from the honey bee.  We are grateful to Ali (and to her bees) for her generosity in facilitating that magical experience.  And now that we have our own bee colonies, we are actively expanding on our knowledge of organic and natural ways to care for them, without the use of toxic pesticides and chemicals.  We are 'newbeeks' as they say; with so much to learn.  But every seasoned beekeeper I have spoken to has expressed that whether you've been keeping bees for 1 year or 20 years, you never stop learning.  These marvelous little creatures are always teaching us something new -  about them, about ourselves or about our place in the circle of life.  It is all very humbling indeed.
 
I am tempted to use this opportunity to share with you important facts about the honey bees as well as the critical role they play in our food supply.  But alas, this is not that kind of post, so you will be spared... for now.  I will just share with you some photos of our bees, which have settled in beautifully and are thriving on our homestead.   
 

As a family we have a new found love and respect for the honey bee and we are pretty certain that our relationship will be a long lasting one.  We are excited to experience the benefits and value that having them around will bring to our lives.

 We are honored to be their stewards.  And maybe... just maybe, if we take good care of them, every now and then they will graciously reward us with a bit of their glorious honey.  Now wouldn't that be sweet?!
 
Thank you for reading and many blessings to you and yours in all of your endeavors.


Sunday, May 18, 2014

Making Herbal Tinctures

First let me say that I feel a bit guilty about the fact that I have not posted any updates in a while. But the truth is we have been busy with life here at the farm; chickens and bees (and other four-legged creatures) have been consuming our existence as of late...and we are loving it!   In short order, I will be catching you up on all of our escapades .

I was speaking with a dear friend yesterday and she expressed an interest in making herbal tinctures for her family but just wasn't sure how to go about it. So this is for you darling!   Oh and by the way, my intention was to make a video tutorial, but the outtakes were getting ridiculous.  We were up to 6 outtakes folks!  So I have decided to keep it simple.  

So what exactly are herbal tinctures? Tinctures are concentrated alcohol based extracts of plants that are very potent and provide an effective way to administer herbal remedies. They are an excellent way to take herbs because not only are they simple to make, but you can make large amount with ease.  When stored properly in brown bottles tinctures can last a very long time compared to other herbal preparations. In fact, tinctures can be stored safely for several years when made with grain alcohol as the carrier.  Tinctures are also very useful when an herb needs to be used over a long period of time. Tinctures are my favorite way of storing herbs because of their versatility; generally speaking, one ounce of tincture is equivalent to one ounce of herb.

You have several options when choosing a liquid carrier for your herbal tincture:
alcohol, food grade vegetable glycerin or raw apple cider vinegar. If you use alcohol as your carrier, be sure to select one that is at least 80 to 100 proof.

“Proof” relates to the actual alcohol/water content in the alcohol. For example, an 80-proof spirit is actually 40 percent alcohol and 40 percent water. A 100 proof spirit is 50 percent alcohol and 50 percent water. The ratio in the range of 50:50 (50 percent alcohol and 50 percent water) provides the perfect balance for extracting the most beneficial properties from herbs, which explains why most tinctured formulas you come across on the market are made using an alcohol carrier. Most vodkas, gins, brandies and rums available are 80 to 100 proof, so any one of them would work just fine in an herbal tincture.

I personally prefer to use alcohol (Vodka) as a solvent because I believe it provides a more potent remedy. I find that the actual amount of alcohol you consume in any given remedy is minimal. However, if I am giving a tincture remedy to one of my small children, I simply make sure that the alcohol is completely evaporated before giving it to them. I do this by adding the tincture drops to  about 2 ounces of filtered water in a glass and waiting a few minutes before allowing them to drink the remedy.

Some individuals however, cannot consume alcohol in the slightest form and may prefer to use food grade vegetable glycerin or raw apple cider vinegar as a carrier instead. If you choose to make a tincture using vinegar it is always best to use raw apple cider vinegar as it has amazing health benefits. Synthetic chemical vinegar (what is found in most supermarket shelves) should not be used. Bragg's raw apple cider vinegar is a great choice. * If you were to use vinegar as your carrier, you would follow the same instructions for the tincture.

Glycerin based tinctures are sometimes preferred if the tincture is being used on the elderly or for small children simply because they are milder on the palate and the digestive tract.  If you choose glycerin, always make sure you use food grade vegetable glycerin.  Also bear in mind that although they do work, non-alcohol tinctures are not as potent because these carriers are just not as effective in breaking down the plant constituents, when compared to alcohol. *If you use Glycerin as your carrier, be sure to mix the amount of Glycerin (1:1 ratio) with one part water before adding it to the herbs.

If you haven't yet read my prior post about the benefits of building a home apothecary, you may read it here.  This tutorial assumes that you have already given thought to and are decided on the herbs you will be using to formulate your tincture(s).

Although more than one herb can certainly be used in a tincture, if this will be your first time making tinctures, I recommend using only one to three  herbs.  Once you become familiar with herbs and how powerful these plants can be, you may experiment more with certain herbal combinations.  I strongly recommend that you always research any herbs you choose so as to become aware of any contraindications.

So here's what you will need to get started:

- Cheesecloth for straining herbs from liquid 
- A mason type glass jar with lid for storing your tincture while it cures
- A brown bottle for storing your tincture when it is done and ready for use 
- Measuring spoons and/or cup (depending on what measurement unit you will use: i.e, 1 cup, 1/2 cup, 1/4 cup, tablespoon, teaspoon)
- Your selected herbs (choose organic or wild harvested whenever possible)       
- Vodka, food grade vegetable glycerin or raw apple cider vinegar (you will need to choose one of these carriers)


Making Herbal Tincture:

(Step 1)
Place your selected and measured herb(s) in a large sterilized mason jar .


(Step 2)
Cover with Vodka (or the carrier of your choice*). Stir herbs to make sure all ingredients are well incorporated.

(Step 3)
Seal the jar tightly and give it a good shake.


(Step 4)
It is extremely important that you ALWAYS, ALWAYS, ALWAYS remember to label your tincture jars clearly. Not only do YOU want to be able to identify what is contained in the jar for future use, but you also want family members to be aware of what is in these jars, for their safety. Do not wait until later to label.  Do it immediately after you place lid on the jar.  Trust me, you will forget!  A simple blank paper with your hand-written legible notes is sufficient. I personally like to include: the date tincture was made, measure used (cup, tablespoon, teaspoon, etc.), list of herbs used, carrier used. A quick description of what your tincture can be used for is quite helpful as well.  Store your jar in a cool dark place for at least 3 to 4 weeks.


(Step 5) 
After 3-4 weeks, you may now open jar and strain the herbs using cheesecloth.  Place cheesecloth over a shallow bowl and pour your mixture.  With clean hands, squeeze any excess liquid.  Work quickly so that the alcohol is not evaporated from the mixture. 


(Step 6)
Pour the liquid into a sterilized amber glass bottle and cover.


(Step 7)
Once again... LABEL, LABEL, LABEL!!!  Label the tincture bottle and store in a dark place.  Your tincture is now ready to be used.


How much tincture to take will greatly vary depending on the emotional make up of the individual, as well as their physical constitution, as all of these factors play a role in how your subject will respond to each remedy.  Generally speaking, one ounce of tincture is equal in strength to approximately 1 ounce of the powdered herb, so 3 drops will be equal to 1/2 cup of tea.   For children or those sensitive to alcohol, always dilute tincture dosage in 1 to 2 ounces of filtered water and allow alcohol to evaporate before drinking.

 
I hope you experiment with this tutorial and choose to make herbal tinctures part of your family's regular wellness routine.  There is no denying that nature provides an abundance of herbs, many of which can be found right in our own front/back yard.  I encourage you to take advantage of these gifts. 

If you are interested in learning more about herbal basics and how to make tinctures and other simple yet effective natural home remedies, look out for my book "Herbal Basics - Heal Your Family Naturally from the Outside In" which will be available online very soon.  In this book I will share my story, my journey and why I am so passionate about helping others understand how they can use herbs and real foods to heal on a deep and lasting level.

Thank you for reading and many blessings to you and yours in all of your endeavors.

NOTE:  This information is not intended to diagnose, cure, treat, or prevent any disease. This information has not been evaluated by the Food and Drug Administration. Keep all herbs out of reach of children and pets. Special care should be taken by pregnant and/or lactating women when handling herbs.

Sunday, March 16, 2014

To Bra or Not To Bra? That Is The Question.


What is the first thing you take off when you reach home after a long day?  Your jacket? Your shoes?  Or... is it your bra?  Speaking from past experience, I would dare say that most women reading this would answer their bra.

I am also noticing that more and more women are discovering that wearing a bra is not all it is hyped up to be.  Some have experienced that bras can actually make breasts droopy and stretched out; and more significantly, they can also cause cysts, pain, and even cancer.  This information is enough to make some forgo the bra altogether. After all, it was always so restrictive and uncomfortable that it was the first thing they took off . So you can say that some women have become bra-free in the name of comfort and health.

For other women however, this is not enough to convince them and their response is a resounding "no way!".  And the cancer detection and treatment industry (along with companies like Victoria's Secret) love these women. They want women to wear bras.  With one million bras sold EACH DAY in the U.S. alone, that's a lot of women binding and constricting the health out of their breasts in the name of fashion and sex appeal. Yet this is not entirely new.  Women have used a variety of garments and devices to cover, restrain, reveal, or modify their appearance.

I found it interesting to read that foot binding became popular as a means of displaying status.  It is estimated that between a billion and four billion women in China had bound feet between the 10th and 20th centuries. This process of crippling and deforming the foot to fit in ridiculously small shoes was considered a mark of status and such tiny feet were considered sexually alluring. Even when the practice was outlawed in 1912, this painful procedure was still practiced on young girls by mothers who feared their daughters would not marry well otherwise.


Corsets also bound women for centuries, to the point of disease and death. From the 14th century onwards, the undergarments of wealthier women in the West were dominated by the corset, which pushed the breasts upwards.  In the late 19th century, bras replaced the corset as the most widely used means of breast support. By the early 20th century, garments more closely resembling contemporary bras had emerged, although large-scale commercial production did not occur till the 1930s. During the 20th century, greater emphasis has been given to the fashion aspects of bras. Bra manufacturing is a multi-billion-dollar industry dominated by large multinational corporations. Bras (especially those that contain under wires) are really breast corsets. They are designed to "shape" the breasts, and this requires harmful pressure and compression of the delicate breast tissue. 
A study performed in 1991-1993 was published in the book Dressed to Kill which discovered that bras can contribute to breast cancer.  Like corsets, they constrict and interfere with circulation.  Lymph fluid cannot easily drain from a bra-constricted breast.  Backed-up fluid results in cysts and pain.  This stagnant lymph fluid cannot be adequately flushed away, concentrating waste products and toxins in the slowly toxifying breasts.  Ultimately, this can lead to cancer. 

It is interesting to note that essentially, a bra-free woman has about the same incidence of breast cancer as a man.  The tighter and longer a bra is worn, the higher the incidence.  24/7 bra wearers have over 100 times the incidence as a bra-free woman.  These findings have been confirmed by studies in China and Venezuela.  A 1991 Harvard study also found a significant bra/cancer link.

Both the lymphatic and circulatory systems provide vital nutrients and allow for the elimination of toxins. The lymphatic’s systems role is to flush out toxins and debris from the tissues. An impairment of the lymphatic system’s flow can lead to the toxification of the breast tissue.  You know how when you leave a rubber band around your wrist it cuts off circulation to your hand?  Well, a bra does the same thing to your lymph fluids - it constricts the flow. All things considered, bra-less really IS better!   

So why do so many women feel it necessary to wear bras anyway? It is obvious that no matter where we turn, we’re bombarded by the media with the idea that our breasts have to look a certain way in order to be considered attractive.  We therefore become willing participants in the effort to literally mash ourselves into these metal-reinforced contraptions. Think about it for a moment... the only people benefitting from them are the few who have decided to gawk at our chests. While we all want to look our best, it’s probably more important to place personal comfort and well-being (i.e., health) as priority over what society thinks about the appearance of our body parts.

There are healthier and MORE COMFORTABLE alternatives.  I personally forgo wearing anything whenever possible (especially if I am home or during bedtime).  However, if I am going out in public, I opt for a thin strap tank or silk cami.  Both offer support but are not restrictive, have no under wire and allow for the flow of blood and lymph fluids.


As a side note, I even wore my nursing bras well beyond the nursing phase, because they offered such great support.  If nursing bras are not a practical option, I highly recommend these very comfortable looking camis for my larger breasted sisters.  The reviews alone are quite encouraging.
 
And if you are concerned that going bra-less will actually sag your breasts, you can take comfort in the fact that a 15-year-long French study recently concluded that going bra less does not promote sagging.

So do take some time to determine what your priorities are with regard to aesthetics and health, do your research, make some informed decisions, and then go bra shopping. The best part in all of this is that you do have options.

Remember... when we are armed with new information we can make better choices that benefit our long term health. 

So what do you think after reading this?  I would love to hear your thoughts.

Sources:
http://www.naturalnews.com/025315_cancer_bra_breast.html
European, Journal of Cancer 1991 ;27(2): 131-5.
Cancer is Not a Disease by Andreas Moritz


Sunday, February 23, 2014

Honey Nut Butter Candy (Sugar Free!) - Recipe


For some time now I have been contemplating making my children some homemade candy.  In my search, I was able to find a few appealing recipes on Pintrest and had filed them away for "later".  

Since time is a commodity for me, I have this rule with recipes...if they do not involve three ingredients or less, I tend to either ignore them or put them in the back (waaay back) burner.   Well, a few days ago, my very cool neighbor mentioned that she recently made some good candy for her daughters using honey, peanut butter and vanilla.  My interested was piqued at the short ingredients list and I quickly asked her to send me the recipe.  Fast forward and in short order I had some really happy children in my home.  It was super easy, delicious and so gratifying to know it had REAL wholesome ingredients.  With candy this good you don't mind them having a treat once in a while.

I am certain this recipe can be tweeked in so many ways.  In fact, I will be making more soon and I am already thinking of how I can make this taste like salt water toffee (which I love!).  Hmmm.

Below is the recipe as it was emailed to me.  I am not sure what blog my neighbor got the recipe from as I received it from her in text form .  Once I find out I will include it on this post.  For now, it should be noted that the cookbook Grain Free Gourmet is mentioned as inspiration for the recipe.  

I altered a few things which are noted in red.  I sure hope you try it for your little ones or yourself and let me know how you like it. 


Sunday, December 22, 2013

Who Needs Pintrest?! (Our Shed Update!!)


If you read my last blog post then you already know how hard my amazing husband has been working at getting my soaping shed to functioning status.  If you haven't read it, I encourage you do so, so you can see the "before" photos and get a better impression of what he's accomplished and why he deserves the "husband of the year" award.

We are almost there!  And I have to tell you, all week I have been feeling like a little kid  - overwhelmed with excitement and anticipation.  I absolutely LOVE renewing spaces. If you asked,  my husband will tell you that I am a very simple woman: nothing makes me happier than a can of spray paint and some old furniture (okay... and a few trips to the thrift store).  Getting his "go ahead" for me to start bringing my things from the garage into the shed made me all giddy inside.

Okay, enough about me.  Let's get right down to the progress we have made.  I warn you - this post will be picture heavy. :-). 

This (below) is what the shed looks like on the outside now.  It is a lot more leveled than it was before.

I added old shutters that were sitting in the garage, after painting them brown and green, for some character.  

The tall dresser (left) was left behind by the prior owner. I painted it and it now stores all of my soap packaging supplies.  I am pleased that everything is organized in one spot, further fueling my OCD nature.   I have had this gorgeous painting (above dresser) for a long time. It was a gift from my late father and I am glad to have found it a home in this special space.
 
 
Are you wondering why so much "green and brown" yet?  Well if you hadn't noticed, green and brown are M&M Soaps' signature colors.  So I appropriately decided to incorporate those colors into the space to enhance the creative energy I seek in this sanctuary.  I was seriously thinking of painting the exterior green, but have decided to hold off on that idea for now. :-)
 
 I love how the space does not look commercial at all.  I wanted it to be much more than just a place for making soap.  I wanted to be surrounded by things that speak to my spirit and things that are  an extension of what is in my home.  It was important to make this very small space as multi-functional as possible, where my children could sit with me and keep me company while I work, or where friends and family could also stay when they come to visit.  All we would need to do is whip out the blow up mattress and electric wood stove (if it's cold), and voila!  Instant comfort and privacy. Okay, well there is the small issue of no toilet or running water but hey, at least they'll have a place to sleep. :-)  
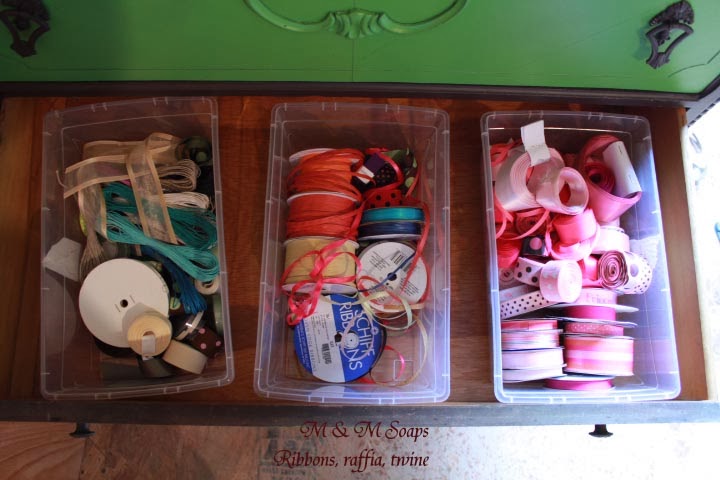
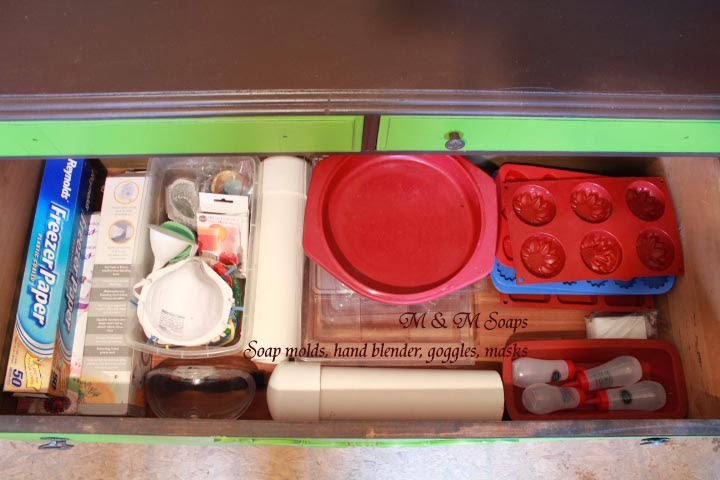
This (left) is another one of the dressers left behind by the prior owner.  This one houses my soaping equipment, soap molds, safety gear, etc.  The empty picture frame above the dresser was also from our old home. 
I found this gorgeous antique looking wrought  iron vase (below) at a local flea market.  When I saw it I just knew that it would be the perfect place to store my cello wrapping paper rolls.  I love it!  The small wall shelf  to the left was used in our former home and has found a new life here as a place for my oil and spice extracts.
I wanted to keep all of my regular essential oils together and in a convenient spot.  Luckily I remembered that we had a brand new bathroom cabinet that we brought with us in the move.  The tall cabinet fit perfectly in this corner and I was able to fit all of my essential oils and other additives with room to spare.
We re purposed one of the old counter tops from our kitchen (below) and turned it into a work table. 
 

The shelving you see on the wall above the finished work table (below), was a hutch to a bedroom set we had purchased second hand for our children which they never used. I painted it I did a miserable job at painting it because it was really windy outside that day. Have you ever tried spray painting in the wind?  Then I know you can totally relate.  Besides, my new mantra is "done is better than perfect".  So there!  It IS perfect. :-)


I was also able to fit a floor cabinet that I once used for the children's crafts (beneath work table) for more storage. Directly on top of this floor cabinet I now sit my bulk oils and more additives. 
 
  My new mantra in print as a daily reminder.  This truly helps balance out my OCD tendencies.

This corner shelf was another great find at the flea market.  It was originally black and I knew that once painted, it would make a nice addition on one of the corners.  I really like love it! 
On top of this dresser (left) sit images of a few of the most important people in my world.  While working in this space I want to surround myself with positivity and images of people that bring out the best in me.  
 
While the weather has been favorable, it has been raining tremendously here which made it hard to do much to the exterior.  We plan on sprucing it up a bit once the ground dries up.  One of the things we will finish doing today is adding a few tons (literally) of flagstones that are being offered for free by a neighbor up the road.  They will make a great pathway and cut down on the mud tracking when it rains.  I was also excited to find three wood pallets in the barn that he will add to the front to make a small porch where I can put a flower planter on one side and also have a small box for my muddy shoes. 

The outdoor sink will be placed on the left side of the shed in the next few weeks.  There is currently a chicken/rabbit coop there that will need to be relocated - it is massive in weight and we just can't move it on our own.
My husband also found a large bay window in the barn (in perfect condition) that we will add to the back wall in an effort to bring in some much needed natural light into the space. 
 
In the end, this did not turn out like the Pintrest inspiration shed at all.  Actually, I think it turned out a million times better.  Why?  Because my family's sweat and energy is invested in this space.  Even our two small children had a small part in it. 


And I am extremely proud of the fact that only a fraction of the materials needed to rebuild the walls and floor were acquired commercially.  We used as much reclaimed wood and building materials as we could find in our barn to rebuild the floors and wall boards, including the tin ceiling.  With the exception of the two flea market finds (second hand corner shelf and wrought iron vase), everything else you see here came from things we already had laying around in the barn,  garage or house.  That to me is so gratifying!

There is another shed that my husband wants to convert into an outdoor school/play room for the children.  He is a brave man.  That shed is bigger but needs A LOT more work.  Stay tuned for that adventure!
 
Thank you for allowing me to share this chapter of our journey with you.  I hope you've enjoyed reading about it as much as we have enjoyed the experience.
 
Blessings to you and yours in all of your endeavors!